


Start with a ready-made Google Sheets cash-flow template. That’s the fastest path to visibility for most small businesses and finance teams. If you need daily or near-real-time data without manual entry, add a live bank-to-Sheets sync. Those are the two paths, and the choice between them comes down to one question: how often does your cash position change in ways that matter?
DIY template suits businesses with predictable weekly cash flows, a tolerance for about half an hour to an hour of weekly data entry, and no budget for a subscription tool. You get full control, zero recurring cost, and a sheet you understand completely.
Automated live sync suits businesses with high transaction volume, multiple bank accounts, or a finance team that needs a current picture without waiting for someone to enter last week’s deposits. The tradeoff is a monthly subscription and a short onboarding step.
Key Takeaways
A Google Sheets cash-flow tracker built on clean formulas and a consistent reconciliation cadence gives most small businesses the visibility they need; adding live bank sync is the right upgrade when manual entry can no longer keep pace.
| Point | Details |
|---|---|
| Start with a template | Copy a tested cash-flow Google Sheet, fill opening balances, and set your transaction categories before entering data. |
| Set a cadence and own it | Assign one person to enter or review transactions on a fixed schedule: daily for high-volume, weekly for most businesses. |
| Build scenarios and track runway | Add an Assumptions tab, create Base/Upside/Downside tabs, and compute months of runway as cash on hand divided by average monthly burn. |
| Reconcile monthly at minimum | Compare sheet closing balances to bank statements, mark reconciled rows, and use a check formula that returns zero when they match. |
| Zenith-books for live sync | When manual entry becomes a bottleneck, Zenith-books’s bank-to-Sheets sync keeps your tracker current automatically with AI categorization and encrypted bank feeds. |
Table of Contents
- How should you set up cash flow in Google Sheets?
- How to build a practical cash-flow workbook in Google Sheets
- How do you get transactions into your sheet?
- How do you turn your sheet into a 12-month forecast?
- What formulas will you actually use?
- How do you keep the sheet accurate over time?
- Why live sync prevents the cash crises that spreadsheets miss
- The honest case for knowing when to leave Sheets behind
- Zenith-books gives you live cash visibility without the manual work
- Useful resources for building your cash-flow tracker
- Sources
How should you set up cash flow in Google Sheets?
The decision tree is short. If you’re running payroll for a moderate-sized team, collecting from dozens of clients, and reconciling three bank accounts, manual entry becomes a liability. You’ll miss timing gaps, and those gaps are exactly what causes cash crises. As Expensify’s forecast guidance notes, a forecast’s job is to project shortages before they arrive, not document them after.
Use this checklist to pick your path:
- Fewer than 50 transactions/week + predictable cash flows: start with a DIY template
- Multiple bank accounts or more than several dozen transactions per week: add a bank-to-Sheets connector
- Need daily alerts or intraday visibility: live sync is the right call
- Budget is zero: manual template, reviewed weekly
- Time is the constraint: subscription sync pays for itself fast
| Factor | DIY Template | Live Bank Sync |
|---|---|---|
| Setup cost | Free | Subscription required |
| Data freshness | As of last entry | Near real-time |
| Weekly time cost | about half an hour to an hour of manual entry | Minutes to review |
| Best for | Predictable, low-volume cash flows | High-volume or multi-account businesses |
| Security considerations | Local/Drive only | OAuth, encrypted API feeds |
Pro Tip: Manual entry isn’t purely a burden. Aspire Budgeting’s research points out that the act of entering each transaction increases spending awareness, which is why some finance teams prefer it even when automation is available.
How to build a practical cash-flow workbook in Google Sheets
You can assemble a working tracker in one sitting. Here’s the sequence:
- Create the workbook. Open Google Sheets, name the file “Cash Flow [Company] [Year],” and share it with view-only access for stakeholders and edit access for whoever owns entries.
- Add five tabs: Transactions, Line Items, Forecast, Assumptions, and Dashboard. Color-code them so the structure is obvious at a glance.
- Build the Transactions tab. Columns: Date, Payee, Amount, Type (inflow/outflow), Account, Category, Memo, Reconciled (Y/N). This is your raw data layer.
- Build the Line Items tab. List every revenue and expense category your business uses. This becomes the lookup reference for your Forecast tab and keeps categories consistent.
- Build the Forecast tab. Three core rows per period: Opening Cash Balance, Total Cash In, Total Cash Out. Closing balance = Opening + In − Out, and that closing balance chains to the next period’s opening. SheetXAI’s guide shows this chaining pattern clearly.
- Build the Assumptions tab. One table with adjustable inputs: expected monthly revenue, average payment delay (days), payroll date, and a contingency buffer percentage. Every forecast formula should reference this tab, not hardcoded numbers.
- Build the Dashboard tab. Three panels: net cash trend (line chart), monthly inflows vs. outflows (bar chart), and a runway gauge (a single cell formula with conditional formatting). Charts pull from the Forecast tab.
For the “Make a copy” workflow: Coupler’s free template and ProjectManager’s downloadable version both include monthly and weekly layouts with pre-built inflow, outflow, net cash, and variance columns. Open either link, go to File > Make a copy, and it lands in your Drive ready to customize.
Transactions tab column layout:
| Column | Purpose |
|---|---|
| Date | Transaction date (not invoice date) |
| Payee | Vendor or customer name |
| Amount | Positive for inflows, negative for outflows |
| Type | Inflow / Outflow / Transfer |
| Account | Which bank account |
| Category | Maps to Line Items tab |
| Memo | Optional note |
| Reconciled | Y / N flag for month-end check |
How do you get transactions into your sheet?
Three methods, each with a different time-versus-accuracy tradeoff.
Manual entry is the baseline. Enter transactions daily or at minimum weekly. Batch entry works: download your bank’s transaction list at the end of each week, paste it into a staging area, then map categories using a VLOOKUP against your Line Items tab. The risk is falling behind. A two-week gap means you’re making decisions on stale data.
CSV import is faster. Most US banks (Chase, Bank of America, Wells Fargo) let you export a date-range CSV. Import it via File > Import in Sheets, map the columns to your Transactions tab structure, and run a deduplication check using a helper column that concatenates date + payee + amount. Recommended cadence: weekly import, monthly reconciliation.
Add-ons and bank-to-Sheets sync eliminate manual steps entirely. The Google Workspace Marketplace lists add-ons like G-CashFlow that automate worksheet creation and transaction pulls. Dedicated connectors go further: they authenticate via OAuth, pull transactions on a schedule, and write them directly to your Transactions tab. The cost is a monthly subscription. The security model matters here: look for OAuth 2.0 authentication (no stored passwords), read-only bank access, and encrypted data in transit. Never paste bank credentials into a Sheet cell or share a Sheet that contains them.
- Manual entry: free, time-intensive, good for low-volume businesses
- CSV import: free, semi-automated, requires weekly discipline
- Add-on / connector: subscription cost, near-real-time, minimal manual work
- Security baseline for any method: use Google Drive sharing permissions carefully; restrict edit access to named accounts only
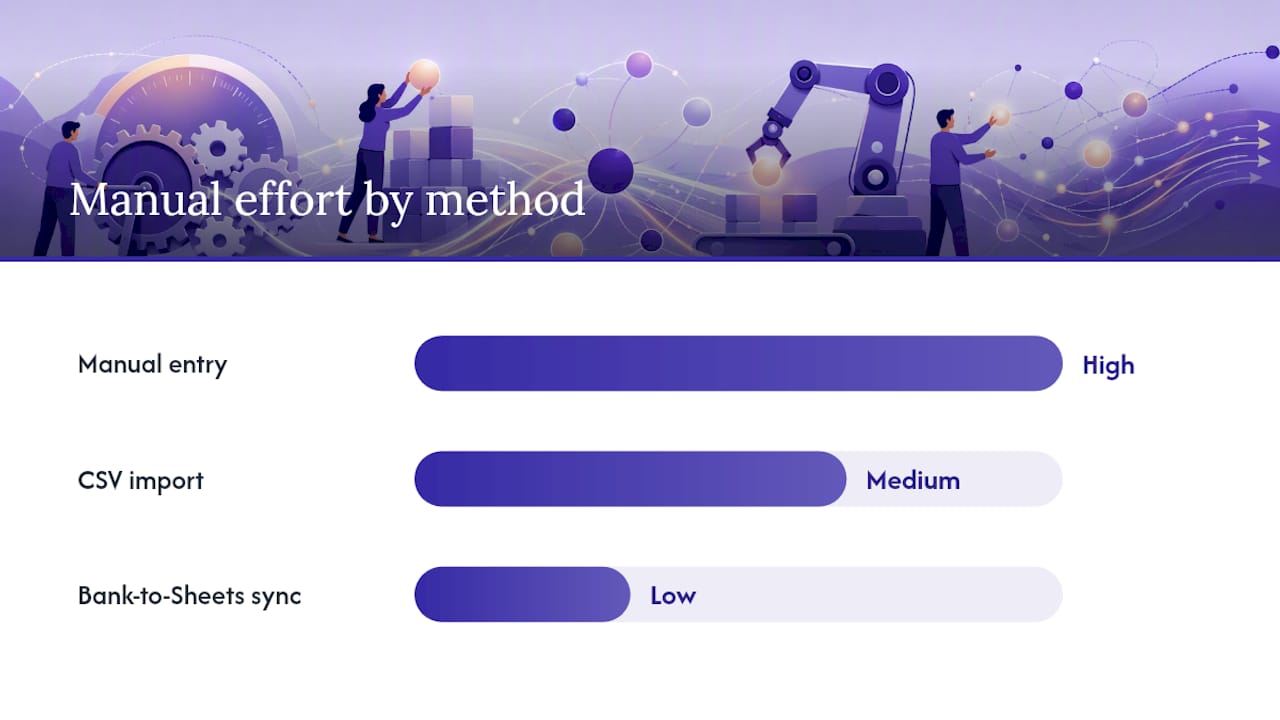
| Method | Cost | Freshness | Manual effort |
|---|---|---|---|
| Manual entry | Free | As of last entry | High |
| CSV import | Free | Weekly | Medium |
| Bank-to-Sheets sync | Subscription | Near real-time | Low |
Pre-built connectors reduce setup time substantially. As TheBudgetBit notes, third-party sync services save significant setup time, though they add subscription cost and require security decisions upfront.
How do you turn your sheet into a 12-month forecast?
The Assumptions tab is the engine. Every adjustable input lives there: monthly revenue target, expected collection delay (days), payroll run dates, rent amount, and a contingency buffer (typically a modest contingency buffer of monthly outflows). Forecast formulas reference named ranges from this tab so you can change one cell and watch the whole model update.
To build scenarios:
- Duplicate your Forecast tab three times. Name them Base, Upside, and Downside.
- In each tab, reference the Assumptions tab but override two or three key cells per scenario. Upside: revenue +20%, collection delay −5 days. Downside: revenue −20%, one large unexpected outflow.
- Add a scenario toggle on the Dashboard tab using a dropdown (Data > Data validation) that switches which scenario’s closing balances the runway gauge reads from.
Runway calculation: months of runway = cash on hand ÷ average monthly burn. Put this formula in a single cell on the Dashboard and apply conditional formatting: green indicating longer runway, yellow moderate, red short runway.
Pro Tip: When running sensitivity analysis, change receivables timing first. Test that lever before adjusting payroll or revenue assumptions.
Flag short-runway months directly in the Forecast tab: add a column that returns “ALERT” when closing cash falls below your minimum threshold (usually one month of operating expenses).
What formulas will you actually use?
These are the patterns worth knowing cold.
Running balance (Transactions tab, column I):
=I2+H3 where column H is the signed amount and I2 is the prior balance. Use $I$2 as an absolute reference for the opening balance row so the chain doesn’t break when you insert rows.
Monthly aggregation with SUMIFS and EOMONTH:
=SUMIFS(Transactions!C:C, Transactions!A:A, ">="&B2, Transactions!A:A, "<="&EOMONTH(B2,0), Transactions!F:F, "Revenue")
This sums all revenue transactions in the month that starts in B2. EOMONTH(B2,0) returns the last day of that month, so the range is always exact.
ARRAYFORMULA for scaling:
=ARRAYFORMULA(IF(A2:A<>"", B2:B*C2:C, "")) applies a formula to an entire column without dragging. Useful for auto-calculating tax amounts or converted currencies across every transaction row.
QUERY for reporting subsets:
=QUERY(Transactions!A:H, "SELECT A, B, C WHERE F = 'Payroll' ORDER BY A DESC", 1)
Pulls a filtered, sorted view of payroll transactions without touching the source data.
Direct method cash flow (net cash row):
=SUMIFS(...) for total inflows minus =SUMIFS(...) for total outflows, both referencing the same date range. The net cash row is simply =B_inflows - B_outflows per period column.
| Formula | Use case |
|---|---|
| Running balance (relative/absolute ref) | Chain closing to next opening balance |
| SUMIFS + EOMONTH | Monthly aggregation by category |
| ARRAYFORMULA | Scale calculations across all rows |
| QUERY / FILTER | Extract reporting subsets |
| Direct method net cash | Period-level inflow minus outflow |
How do you keep the sheet accurate over time?
Reconciliation is where most spreadsheet cash-flow models break down. The sheet drifts from reality, someone stops trusting it, and it gets abandoned. Here’s how to prevent that.
Monthly reconciliation checklist:
- Compare the closing balance in your Transactions tab to the bank statement closing balance for each account.
- Identify any outstanding checks or deposits in transit and note them in the Memo column.
- Verify that all transfers between accounts appear as both an outflow (source) and an inflow (destination) so they net to zero.
- Mark every matched transaction with “Y” in the Reconciled column.
- Run a check formula:
=SUM(IF(Transactions!H:H="Y", Transactions!C:C, 0)) - [bank_closing_balance]. If this returns zero, you’re clean.
Red flags to watch for:
- Closing balance goes negative multiple consecutive months (timing mismatch, not just a bad month)
- Accounts receivable days growing without a corresponding revenue increase
- Outflows that don’t map to any Line Items category (uncategorized = uncontrolled)
- Transfers that appear on one side but not the other
Recommended cadence: daily quick scan for high-volume businesses (more than a high daily transaction volume), weekly review for most small businesses, and a formal monthly reconciliation against bank statements for everyone. For supplier statement reconciliation, the same matching logic applies: compare what your sheet shows as paid against what the supplier shows as outstanding.
Pro Tip: Add a dedicated “Reconciliation” tab with one cell per account that pulls the sheet’s closing balance and one cell where you paste the bank’s closing balance. A third cell shows the difference. When it reads zero, you’re done.
Why live sync prevents the cash crises that spreadsheets miss
Cash-flow problems rarely appear overnight. They build from cumulative timing mismatches: a customer pays 15 days late, a vendor pulls payment forward, payroll hits before the receivable clears. Each gap is small. Together, they drain a reserve that looked healthy on last week’s sheet.
A manually updated sheet captures these gaps only as fast as someone enters data. A live bank-to-Sheets sync captures them as they happen.
Zenith-books’s live cash-flow sync connects bank accounts directly to Google Sheets, writing transactions automatically as they clear. The system uses AI to categorize each entry, flags unmatched items for review, and keeps your Transactions tab current without manual imports. Clients like BAM Chocolate report zero manual entry across transactions and materially shorter month-end close times after switching.

Security is handled through OAuth 2.0 authentication with read-only bank access. No credentials are stored in the Sheet. Data flows are encrypted in transit, and account permissions follow least-privilege principles: the sync writes to your designated Sheet tab and nothing else. For teams managing cash balances across multiple accounts, that consolidated view updates automatically rather than requiring a manual aggregation step.
The honest case for knowing when to leave Sheets behind
Spreadsheets are genuinely good tools for cash-flow tracking up to a point. The template-plus-manual-entry approach works well for businesses with stable, predictable cash flows and a disciplined owner who reviews the sheet weekly. The formulas in this article will hold up for years.
The limitation shows up when the business grows past the point where one person can maintain the sheet reliably. A missed import, a miscategorized transfer, or a formula that breaks when someone inserts a row can corrupt months of data silently. By the time someone notices, the damage to decision-making is already done.
The path I’d recommend for most Zenith-books customers: start with a clean template, run it manually for 60–90 days to understand your own cash patterns, then add live sync when you find yourself checking the sheet more than twice a week and wishing it were more current. That transition point is usually obvious. The sheet stops feeling like a tool and starts feeling like a chore.
One thing worth noting: businesses that move to automated sync consistently report fewer reconciliation errors and faster closes. The time savings are real, and they compound.
Zenith-books gives you live cash visibility without the manual work
Manually maintained sheets are a good start. But when your business reaches the point where daily accuracy matters, the gap between “last updated Tuesday” and “updated this morning” is the difference between catching a shortfall and reacting to one.

Zenith-books connects your bank accounts directly to Google Sheets, pulling transactions automatically, categorizing them with AI, and keeping your cash-flow tracker current in near real-time. The bank-to-Sheets sync handles multiple accounts, flags unmatched items, and writes clean data to your existing sheet structure. On top of that, automated invoice extraction pulls vendor invoices from email and files them to Google Drive, so your outflow data is complete before you even open the sheet.
Getting started takes one session: connect your bank accounts, map your existing Sheet columns, and let the first sync run. From that point, your cash-flow tracker updates itself. Start a free trial at Zenith-books to see how it fits your current setup.
Useful resources for building your cash-flow tracker
- Cash Flow Forecast Google Sheets Template (Coupler) — free monthly and weekly templates with a “Make a copy” workflow
- Cash Flow Forecast Template (ProjectManager) — monthly and weekly options with pre-built variance columns
- Cash Flow Forecast Template (Expensify) — forecast skeleton with inflows, outflows, and opening/closing balance rows
- How to Create a Cash Flow Forecast in Google Sheets (SheetXAI) — step-by-step guide covering balance chaining and assumptions tables
- G-CashFlow on Google Workspace Marketplace — add-on for automating worksheet creation directly in Sheets
- Supplier Statement Reconciliation Guide (Zenith-books) — practical AP reconciliation steps that complement your cash-flow tracker
This article is general information, not a substitute for advice from a qualified financial advisor. Consult a qualified financial professional about your own circumstances before acting on anything here.
Sources
- Cash Flow Forecast Template for Excel (Free Download) — ProjectManager
- Cash flow forecast template | Expensify resource center
- How to Create a Cash Flow Forecast in Google Sheets | SheetXAI
- Cash Flow Forecast Google Sheets Template — Coupler blog